How to Create a Deal in Marketplace Pipeline
Purpose
Create a deal in Marketplace Pipeline so it shows up on your Deals board and can be registered with Microsoft for co-sell.
Before you start (required checks)
- Partner Center must be connected. You should see "Connected as [Company name]" under the page description. The connection must be done by a user with the Global Admin role in Partner Center. Without it, you cannot create deals.
- Have this information ready: customer country and company name, deal amount, expected close date and deal owner.
Three ways to create a deal
- Option A --> From a lead: accept a lead in the Leads tab.
- Option B --> Add manually: create one deal from scratch.
- Option C --> Bulk upload: paste or upload several deals at once.
🟣 Option A --> Create a deal from a lead
Step 1. Open the Leads tab
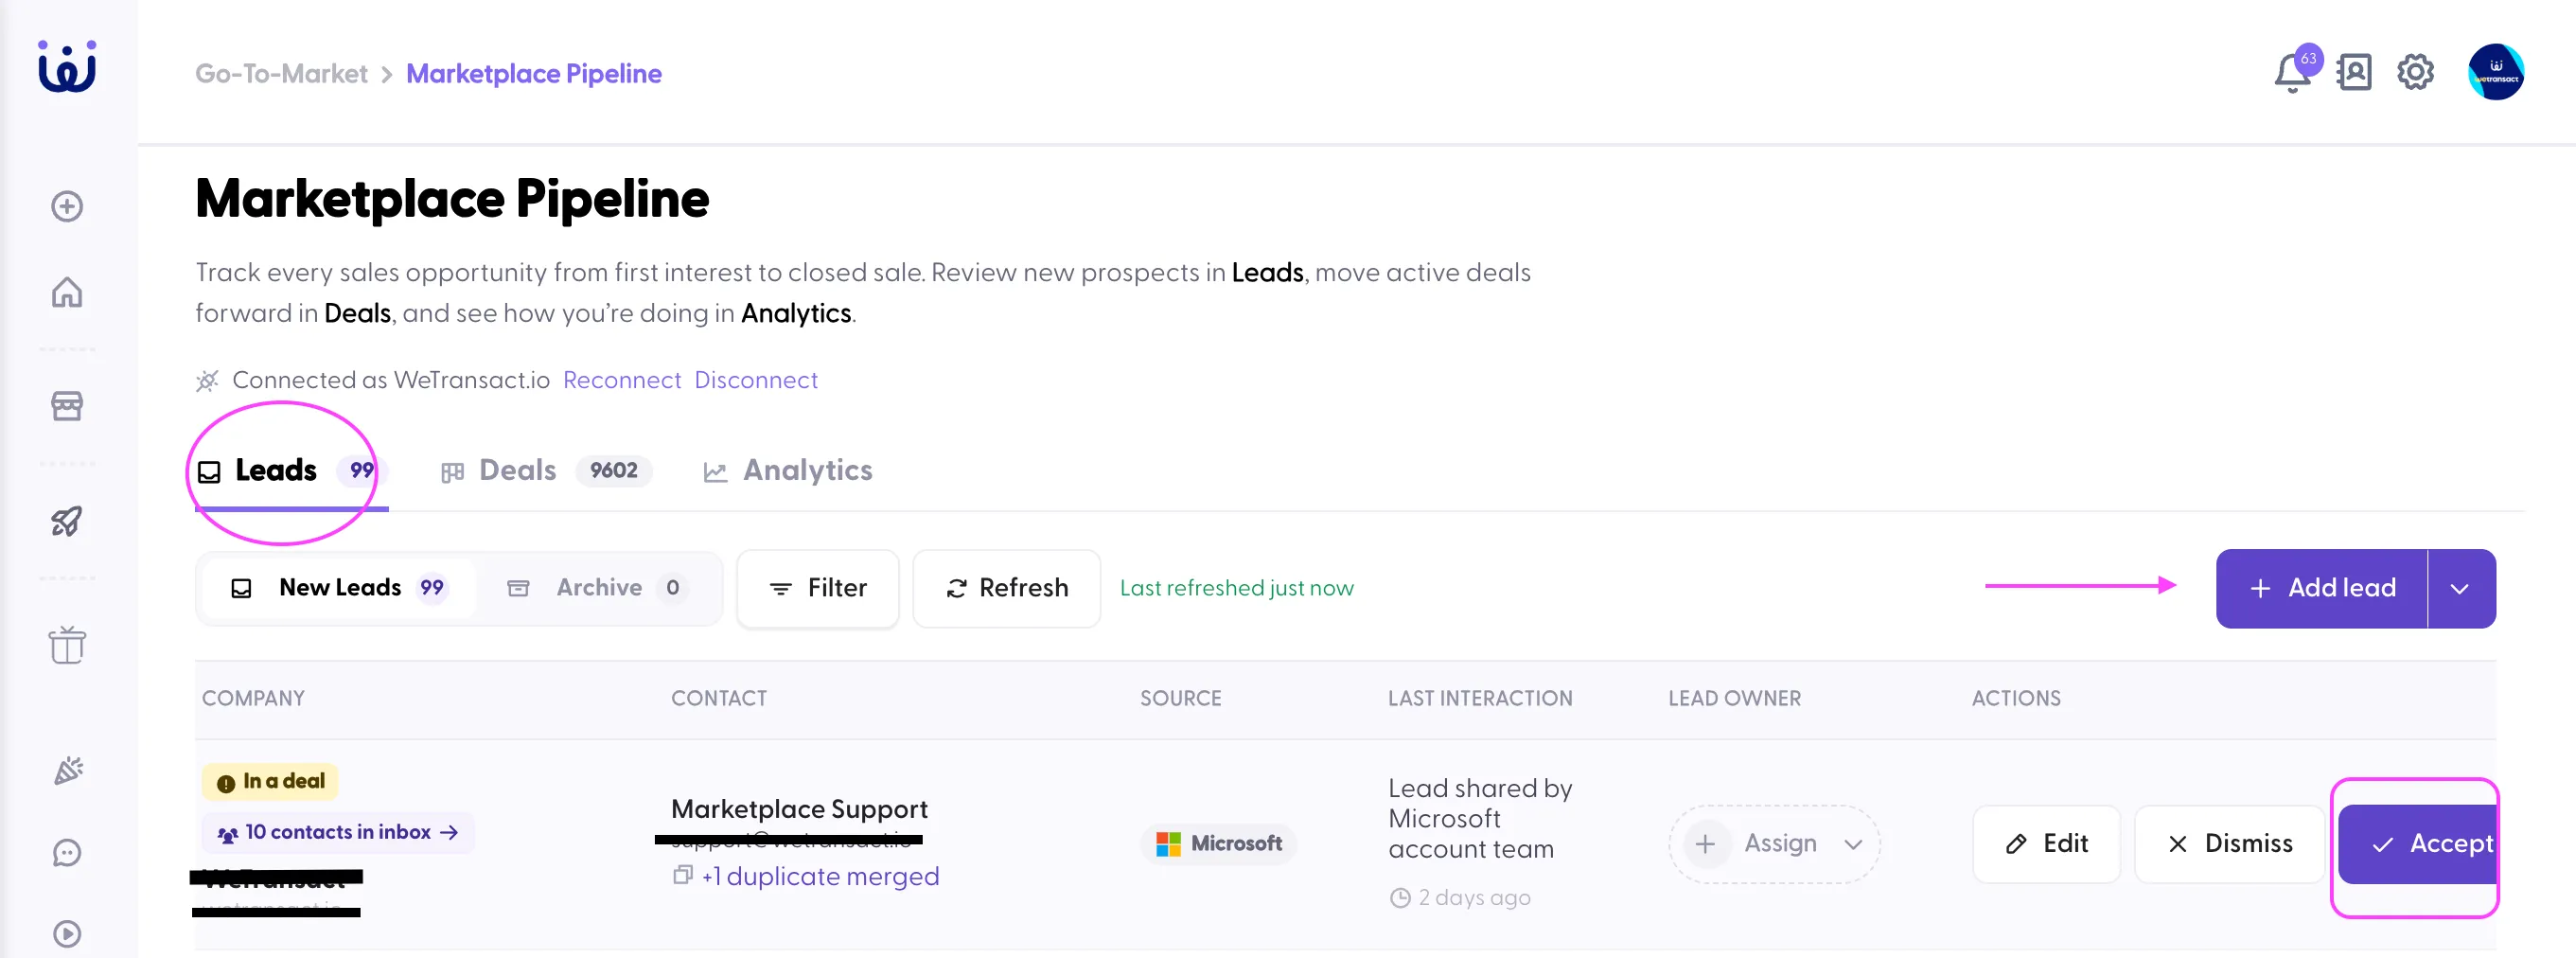
Go to Go-To-Market → Marketplace Pipeline and open the Leads tab.
Step 2. Review and accept the lead
- Check the Company, Contact, Source (e.g. Microsoft) and Last interaction.
- Optional: assign a Lead owner with Assign.
- Click Edit to correct the lead details if needed, or Dismiss if the lead is not relevant.
- Click Accept to move the lead into your deal pipeline.
Important: if the lead shows the "In a deal" tag, check the Deals tab first to avoid creating a duplicate deal.
🟣 Option B --> Add a deal manually
Step 1. Open the Add deal menu
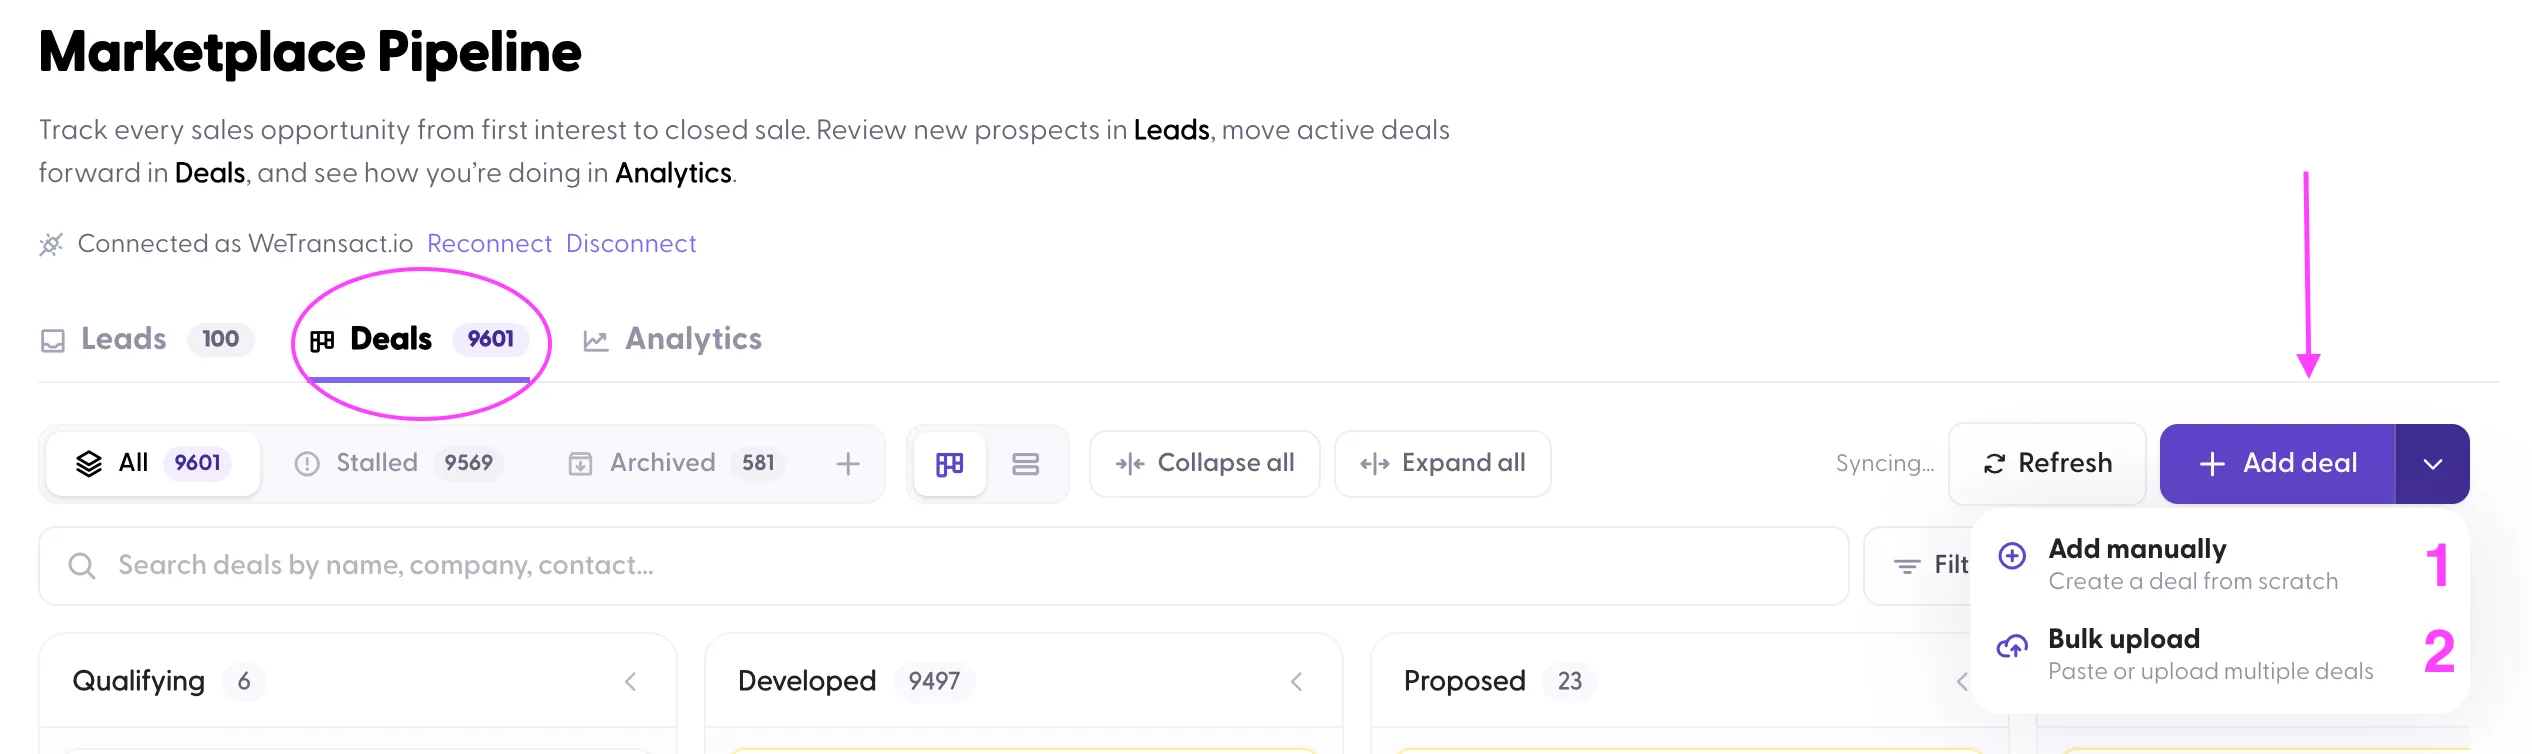
In the Deals tab, click the arrow next to Add deal and select Add manually (create a deal from scratch).
Step 2. Find the customer and fill in the deal details
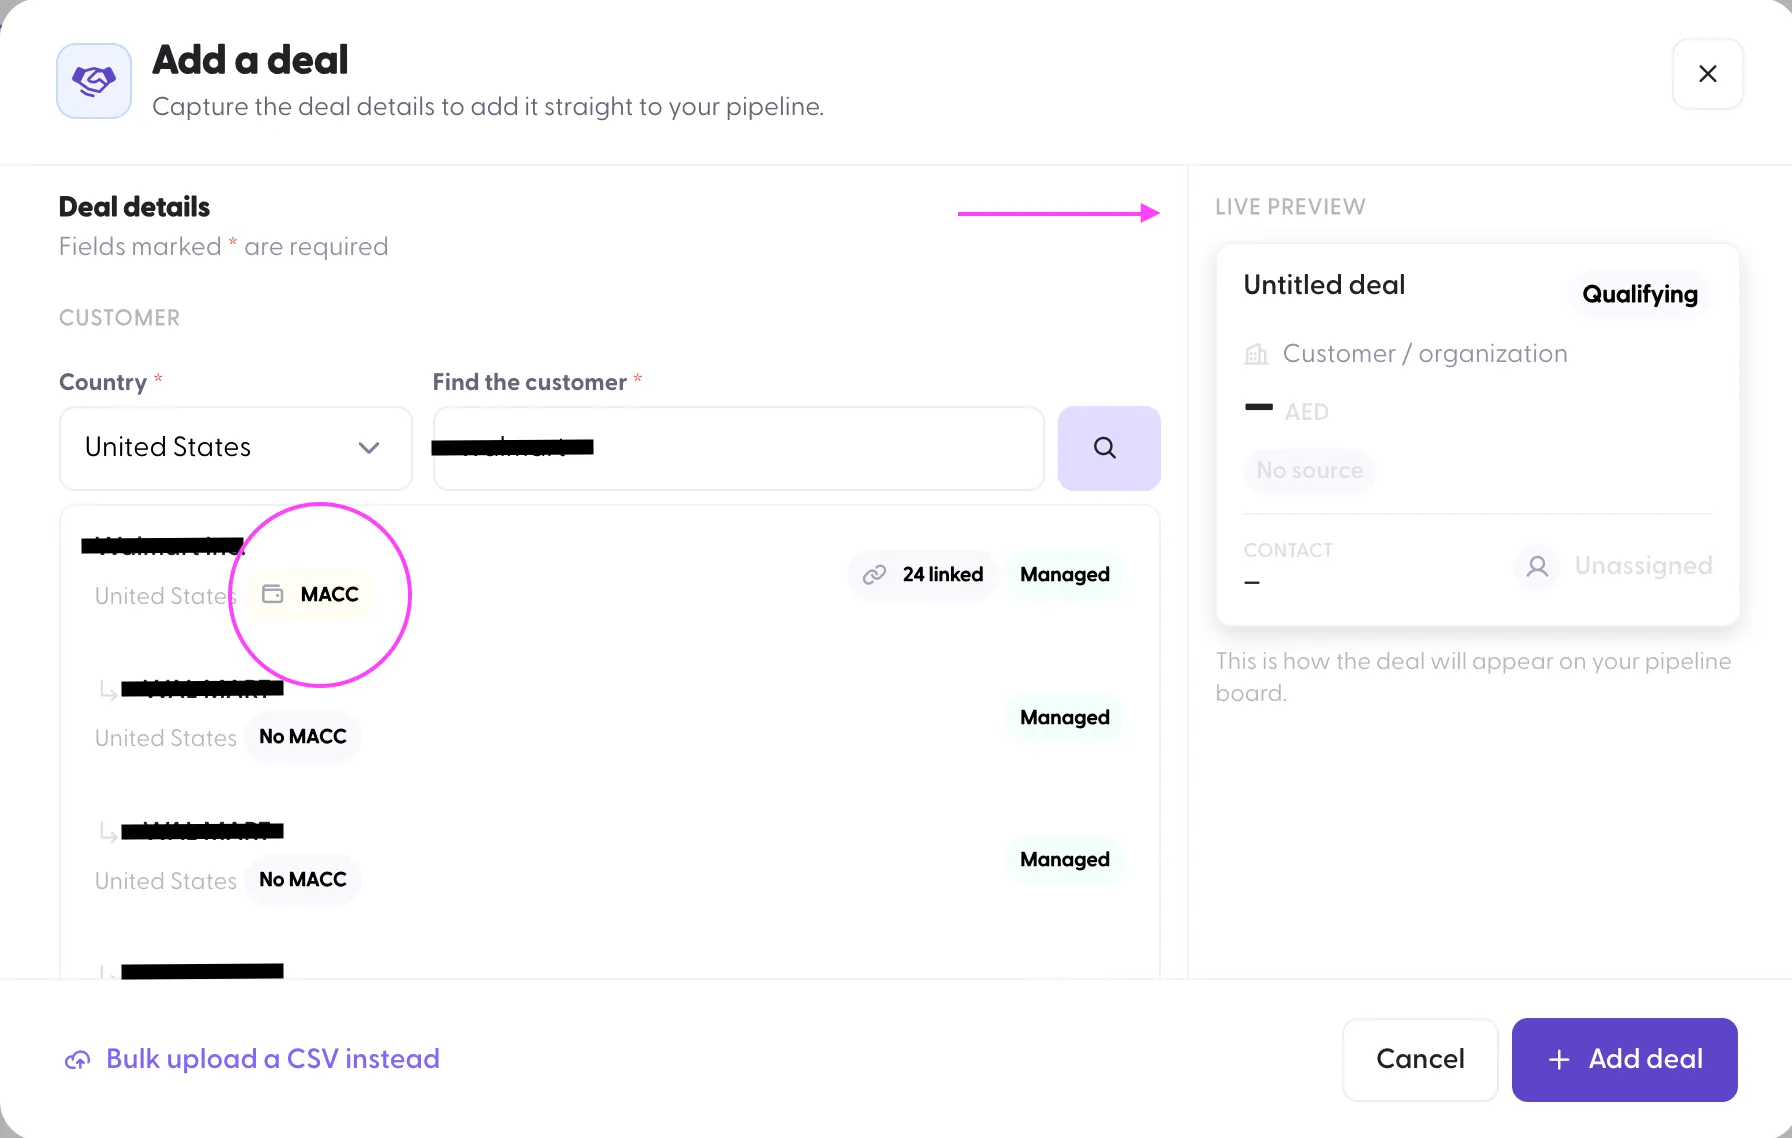
- Select the Country (required).
- Type the customer name in Find the customer (required) and click the search icon.
- Select the right record from the results. Each result shows MACC or No MACC (whether the customer has a Microsoft Azure Consumption Commitment), the number of linked entities (e.g. "24 linked") and the Managed tag.
Tip: when several entities match, pick the one with the MACC tag if the deal should count toward the customer's MACC. MACC data comes from Target Customer data.
Fill in the following deal details:
- Website (optional)
- Deal name
- Close date
- Deal amount and currency
- Product listing(s)
- Contact details (customer's full name, email and phone). You can add more than one contact.
- Deal source and deal owner
On the right, the Live Preview shows how the deal will appear on your pipeline board.
Once everything is filled in, click +Add deal.
🟣 Option C --> Bulk upload several deals
Step 1. Open Bulk upload
Click the arrow next to Add deal and select Bulk upload. You can also click Bulk upload a CSV instead at the bottom of the Add a deal window.
Step 2. Add your deals
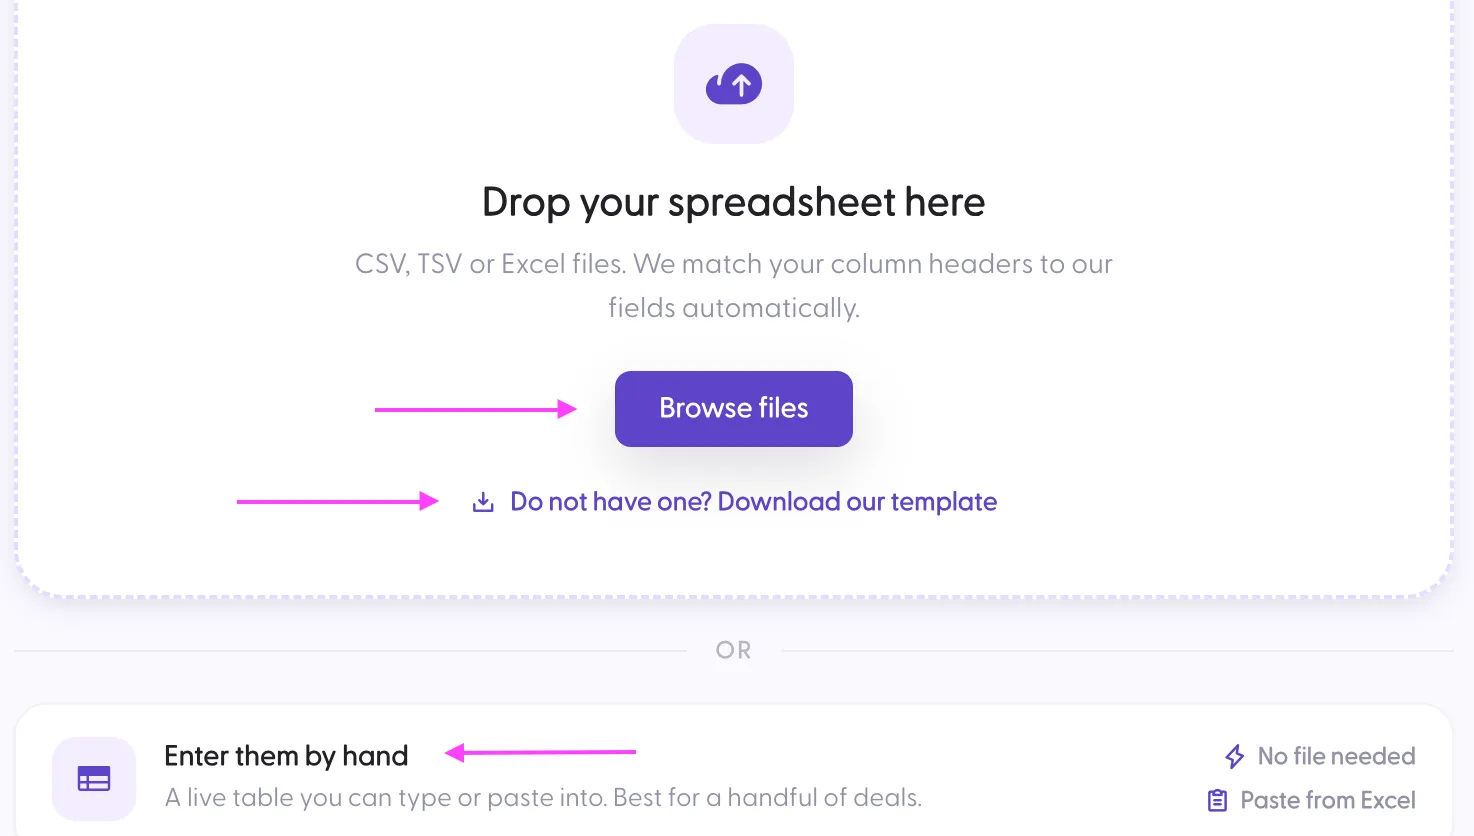
- Upload a file: drop your spreadsheet or click Browse files (CSV, TSV or Excel). Column headers are matched to the fields automatically.
- No file yet? Click Do not have one? Download our template, fill it in, then upload it.
- Enter them by hand: a live table where you can type or use Paste from Excel. Best for a handful of deals.
After the deal is created
Step 1. Find the deal on the board
New deals appear in the Qualifying column.
Deals move through these stages: Qualifying → Developed → Proposed → Negotiating → Closed Won.
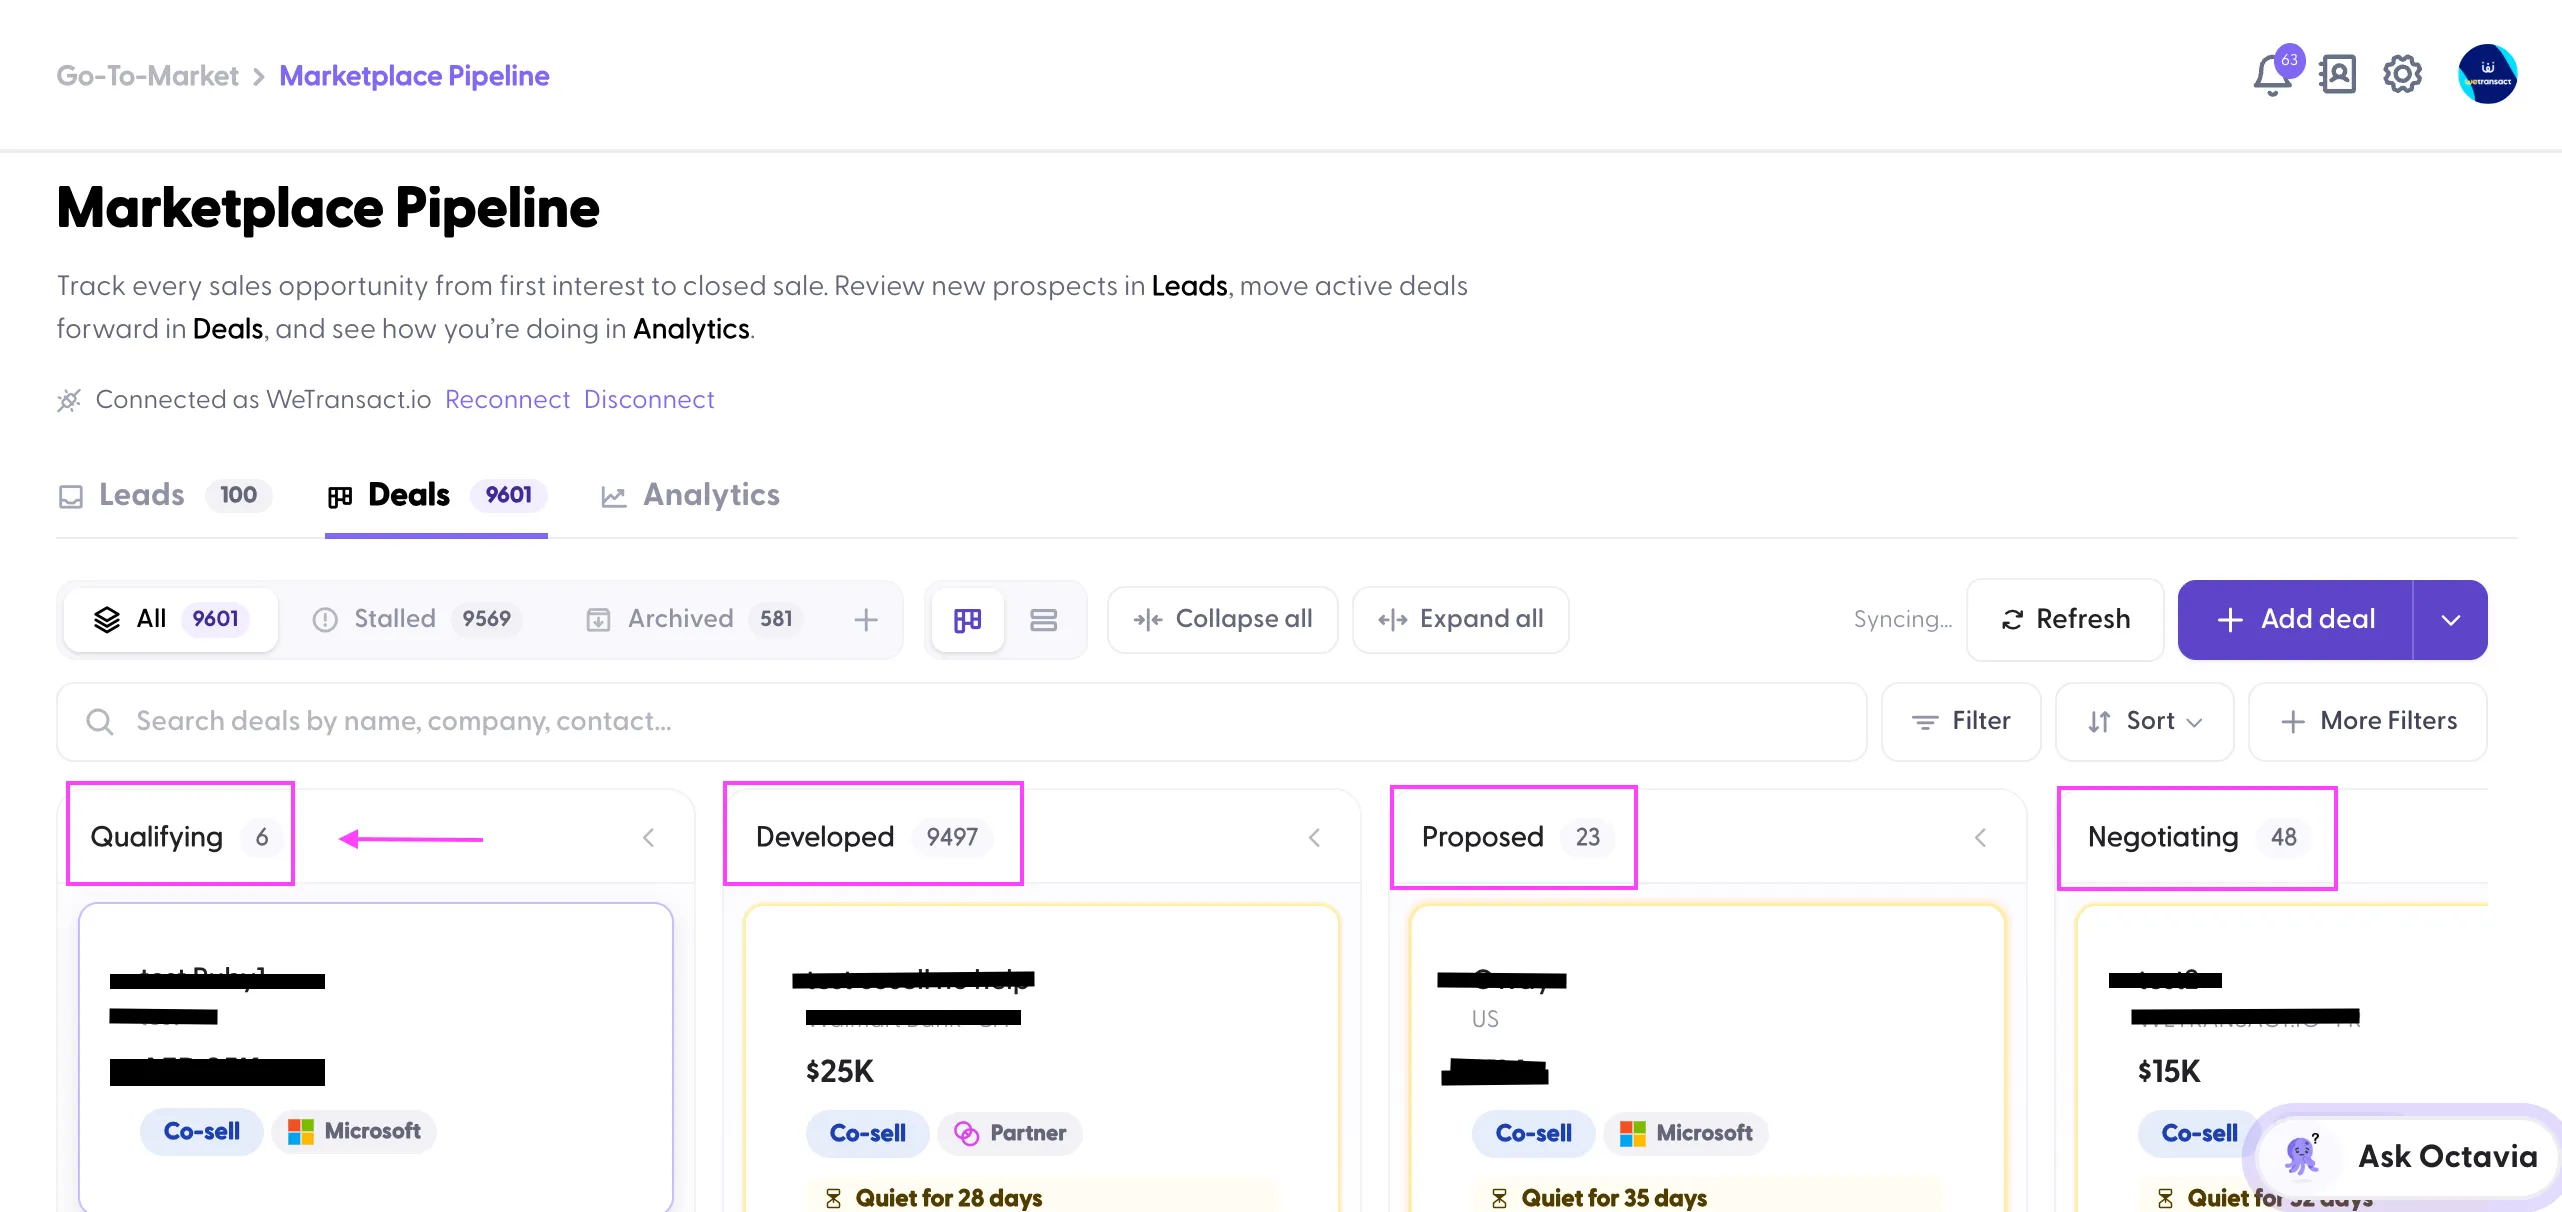
Step 2. Open the deal and complete the key details
Click the deal card. Review and update Deal amount, Expected close, Deal owner and Account executive, then click Update.
Step 3. Submit the deal to Microsoft
- Follow the Next step box: confirm budget, authority and timeline.
- Click Submit deal to Microsoft to register the deal so Microsoft can see it.
- Other actions: Advance to Developed to move the deal to the next stage without submitting to Microsoft, or Mark lost.
Important: double-check the customer, amount and close date before submitting, as the deal becomes visible to Microsoft.
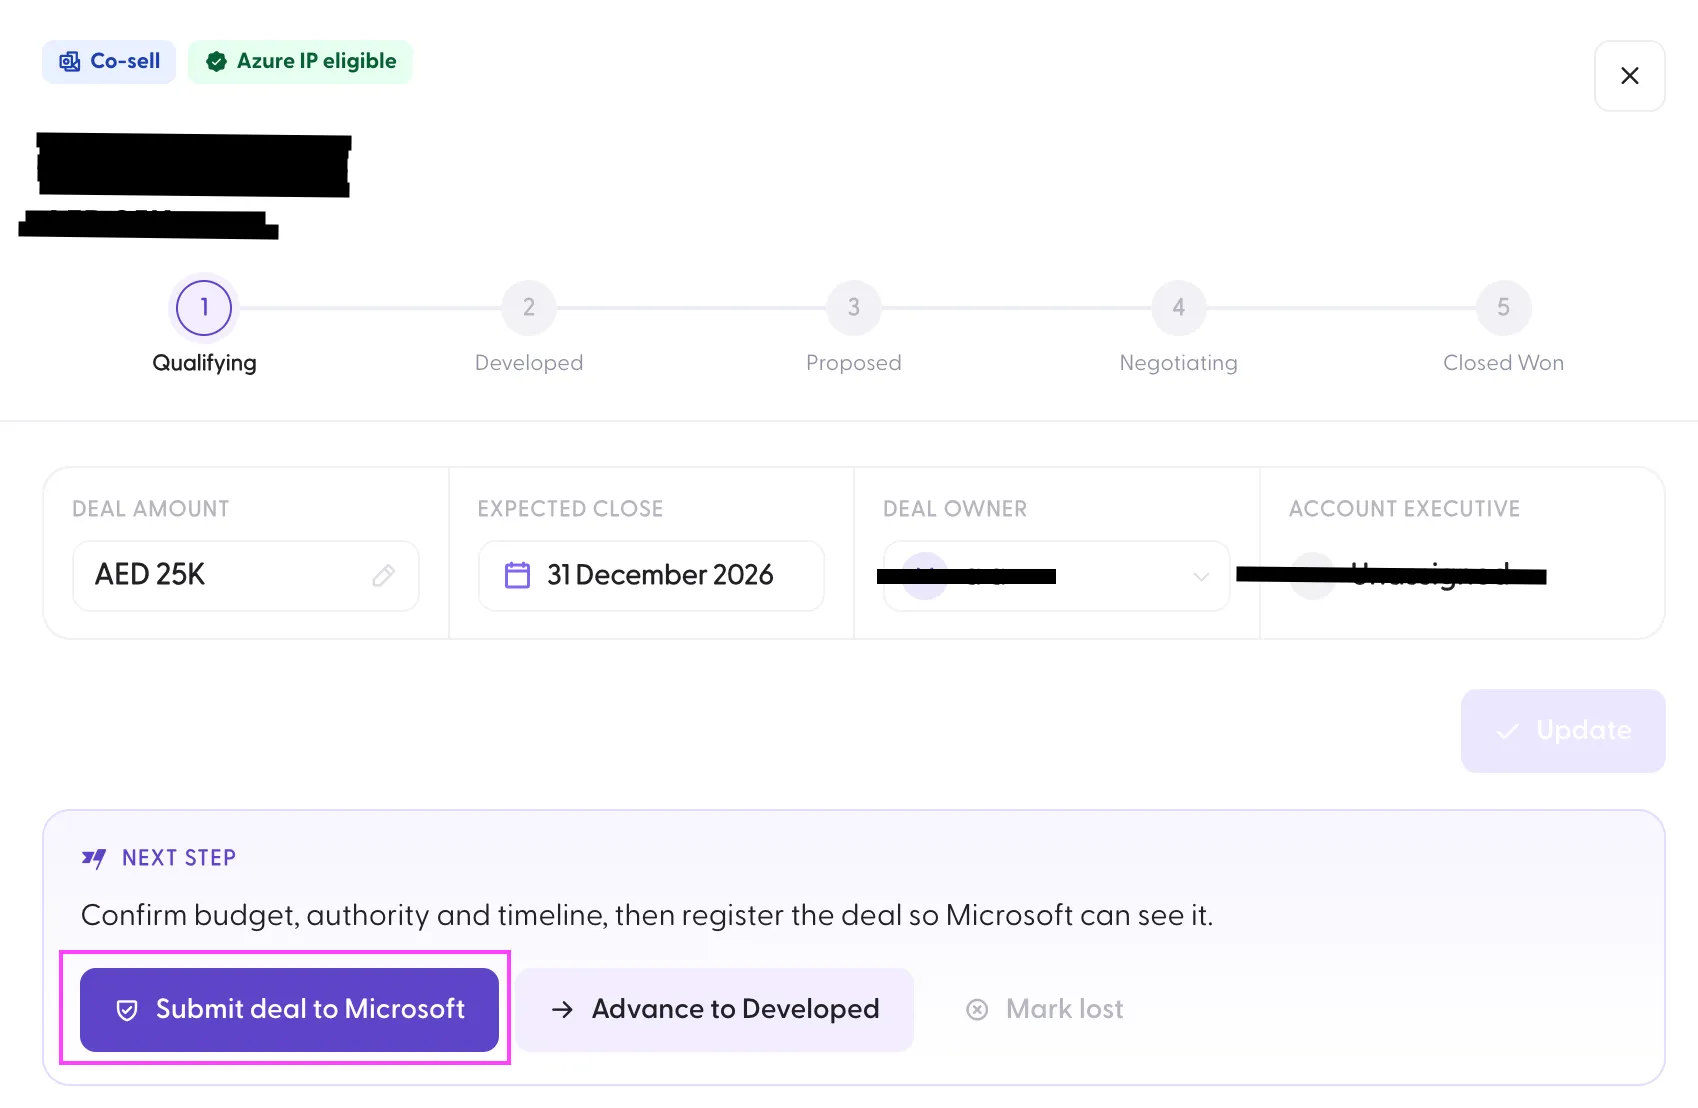
From the deal view, you can also edit the Primary Contact (email and phone), view the Deal Details, log activities and add internal notes.